Saturday, November 08, 2014
Napoleon at War Replay from Hexwars - 7/29/2011
Figure 1 – Starting Positions
My opponent on Hexwars. com chose to not use the “fog of war” option which means that you cannot see your opponents forces on the game board unless you are in range or within a zone of control. I prefer to use the fog of war option, since it adds the uncertainty that exists in a more realistic simulation.
Another advantage I have as I play the part of Napoleon is that I already know that the Prussians will arrive on the French right flank somewhere during turn 2. They have to enter on a clear hex (non-forest).
The basic plan I had at the start was to try and hit hard in the center, and work some forces over to the left side of my line to threaten the British right flank. Since this game has the Prussians entering the fight on the east edge in a clear hex, I decided to try and race some of my more mobile units to the eastern edge to try and prevent the Prussians from entering too close to my right flank. It is possible to block the Prussians from entering too close to the French lines, which would buy me some time.
Figure 2 – After the French movement phase, and combat phase.
The British 3-3 Reserve artillery was forced to retreat in the center. The Det/I 1-4 Infantry was defeated by overwhelming odds and eliminated. At the end of the French attack, the Allies had lost 1 point to no French losses.
Figure 3 – Second Allied Retreat in Center
Two Allied artillery units were forced to retreat in the center.
Figure 4 – End of French Turn 1
Allied Turn 1
The Allied player was very aggressive on this first turn. Rather than drop back and wait for the Prussians to arrive, he did a lot of damage to my front lines.
Figure 5 – Allied Turn 1 Attack
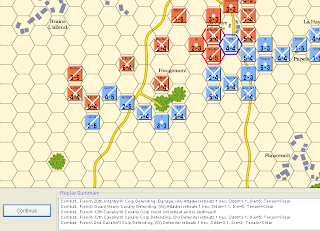
The first attack was a 3-1 assault on the French 2nd Cavalry on the French right flank The involved units have their hexes highlighted in figure 5.
Figure 6 – Second Allied Attack on French Right
The next attack came again on the French right flank.
Figure 7 – Third Allied Attack of Turn 1
Figure 8 – Fourth Allied Attack of Turn 1
Figure 9 – Fifth Allied Attack of Turn 1
Figure 10 – Sixth Allied Attack of Turn 1
Figure 11 – Situation at the End of Turn 1
French Turn 2
I decided that I had better step up my own attacks with what I could. I made a gamble to try and seal off the eastern edge of the map where I thought the Prussian reinforcements would cause the most damage. I located cavalry units along the eastern side to put a ZOC (Zone of Control) over the most clear hexes as possible.
My other plan was to try and dislodge the infantry 1 Br/I, but I soon learned I could not occupy the wooded hexes to the south of this unit. The situation did not look good for the French, because there were not a lot of opportunities for high odds attacks. Below is a screen shots of one of the attacks that I made along the front.
Figure 12 – French Attack Allied Right
Figure 13 – Situation After French Portion of Turn 2 Complete
Figure 14 – Status at Start of Allied Movement Phase of Turn 2
Turn 3
The Allied player continued his aggressive attacks against the French. The French center was close to being wide open at this point, with not enough units to maintain the wide front. The Allies only need to eliminate 40 points worth of French units in order to achieve a victory. At the start of turn 3, the Allies were very close to this.
After the first couple of attacks, the French lost units in an attack, which brought about an Allied victory in turn 3.
Figure 15 – Start of Turn 3
Figure 16 – Allied Victory Turn 3
Figure 17 – Victory Points
Subscribe to:
Post Comments (Atom)


No comments:
Post a Comment